TROUBLESHOOTING
We have established the following simple guidelines to assist you in caring for and maintaining your Dreamscreens to ensure years of trouble free use:
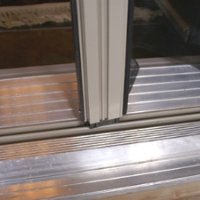
- The most important thing you should do is to keep the bottom track free of dirt, sand and debris that may affect door performance. Periodic vacuuming of the track and the lower screen housing is required. The track should be vacuumed using a narrow nozzle when the screen is in the retracted position and the lower housing when in the open or screening position.
- Always keep Dreamscreens stored in the retracted position when not in use. When the screen is retracted safely in the housing, there is no exposure to potentially damaging environmental elements and the life of the screen mesh will be extended substantially longer. If the screen remains in the open or screening position for prolonged periods of time it will reduce spring effectiveness. Just remember when you open the door, open your screen and when you close the door to retract your screen.
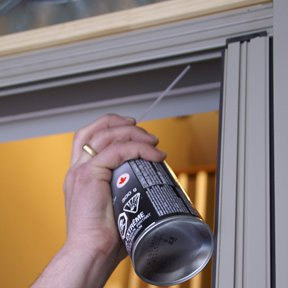
- If the Dreamscreens have not been used in a while or are not opening smoothly, they may require lubrication. Always use a greaseless Silicone spray. Other sprays like WD-40can attract dirt and reduce the effectiveness of the door operation. We highly recommend Canadian Tire: MotoMaster Silicone Lube. Simply apply a small quantity along the front edge and inside of the top and bottom tracks and cycle the door open and closed several times. Wipe off any excess and this should restore the smooth operation of your door. Spray should be applied every 1-2 months during the time you are using it.
- Remember that the door uses a spring to keep tension on the screen and will retract abruptly if the handle is released or the mesh material is pushed in. Always retract the screen slowly using the handle to guide the screen evenly into the housing. Numerous abrupt or sudden retractions may eventually cause damage to the product and it is recommended that those using the door be educated on how the product functions,
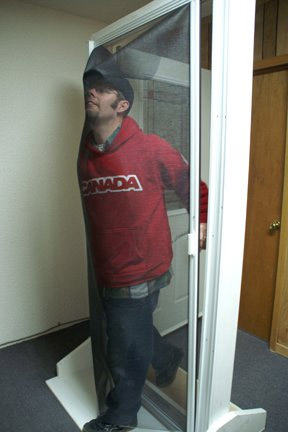
- Dreamscreens are very easy to see through and may not be noticed when the screen is in the open screening position. To prevent an accidental walkthrough you may want to consider weaving a bright colored thread through the screen at eye level or using a decorative stencil with acrylic paint to create a design. Even small thin vinyl adhesive back decals may work to call attention to the screen. Just be sure that the thread or decals are thin enough as to not impair screen operation.
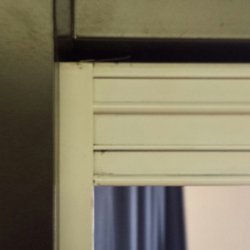
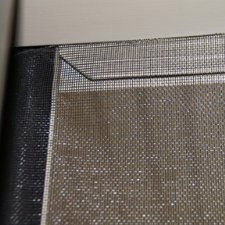
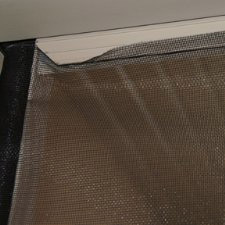
- It is normal for the screen material to sometimes sail outside of the tracks during very windy conditions and our exclusive deep top track design helps to reduce this situation from occurring. However if this does occur, be sure to bring the screen to the inside (the same side as the 45 degree angle cut on the top track by the housing), retract the screen and open it again causing the screen to automatically reset itself.
Troubleshooting Tips
The following tips are offered to assist Dreamscreens owners with identifying a potential cause of a problem and how to correct the discrepancy.
Door Drags:
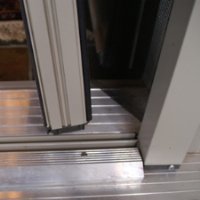
- If newly installed this is usually due to the guide rails being out of square to the frame.
- Make sure the angle between the lower guide rail and the screen housing is 90 degrees or slightly less. To check, pull the screen across so magnets are connected. Set a carpenter square on the top edge of the lower guide rail and then slide the square against the side of housing. If the angle is more than 90 degrees, the top guide rail may need to be shortened and the top of the screen housing moved in towards the door opening.
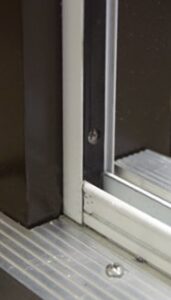
- Drag or hesitation can also be caused if the top and bottom guide rails are not fully inserted into the clips located on the either end of the housing or jamb support magnet.
- Check to be sure that the rail guides are fully inserted flush against these components. If the top and bottom guide rails are not cut even or square on the ends, the rail guide may not insert fully.
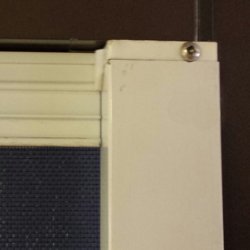

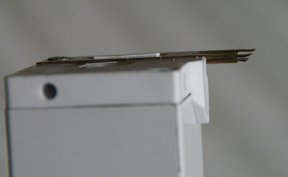
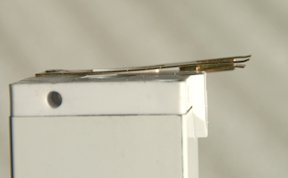
- Check to see if the gold colored housing clips are snapped tight against the top and bottom housing end caps so that they are flush against caps and the boss on the housing end caps protrudes through the slot on the clips. These clips can be partially raised or elevated during the installation process and must sit flat.
- Check to be sure that the rail guides are fully inserted flush against these components. If the top and bottom guide rails are not cut even or square on the ends, the rail guide may not insert fully.
- If the top or bottom guide rail is pinched, bowed, or dented, it can create an out of parallel condition and can cause excessive drag or hesitation. If the guide rails are installed so they are not parallel or damaged in this way, they will need to be brought into a parallel condition or possibly replaced. The most common problem is with the lower guide rail caused by sitting on an uneven surface. Set the level on top of the bottom guide rail and check for level or bowing. If there is a gap or rocking under any part of the level it may be necessary to add shims to achieve a parallel or level condition.
Screen Wavy or Bunching:
Another indication that the door is out of square is if there is “waviness” or “bunching” in the bottom of the screen when the door is being retracted. If this condition exists, check for square as indicated by the previous tip.
Door Sticking or not Retracting:
- If the door sticks or fails to close completely, dirty guide rails can cause the problem. Clean and lubricate the rails as described in the “Service & Maintenance Guidelines” and this should resolve the problem.

- Should the screen mesh material become creased due to a fold, it can easily be removed by using a hair dryer. Open the screen so that the magnets are connected, push the screen out of the housing using the palm of your hand to the screens full extent. Locate the crease/fold and flatten the screen mesh so that it is no longer folded. Then using a hair dryer in the high heat and maximum air setting, direct the flow on the creased area from approximately 6″ away and the crease will disappear in seconds.
- If the door hesitates or stops in a certain spot you may need to put in a shim. Place a flat head screw driver under the lower guide rail in various spots until the door retracts properly. Once you have found the location for your shim, use a washer, piece of aluminum, or a coin and push underneath lower guide rail.
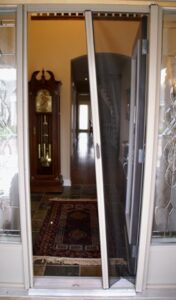
Walking into Screen:
- If someone/something accidently walks into your Dreasmcreens and only the screen somes out of housing.
- Simply pull screen back behind top guide rail where 45 degree cut can be seen.
- Lay flat against top guide rail, and retract the screen.
- If someone/something walks into your Dreamscreen and the pull rail comes out of the top or bottom guide rail.
- Angle pull rail just above bottom guide rail.
- Slide pull rail end cap into bottom rail.
- Pull firmly until end cap pops into place with rail. Open and close door to make sure working.
If one of these solutions does not fix your problem, please call us.
More Tips
- Drag or hesitation while opening or closing the door when it is new is almost always due to the guide rails not being parallel
- Drag or failure to close completely is usually due to dirty or sticky guide rail. Clean the rail, then apply a silicone lubricant. Lubrication is important.
- There is a normally some “waviness” in the screen surface with the door closed. If there is excessive waviness, it is likely that the door is not square or the guide rails are not parallel.
- If the jamb is not parallel to the housing, the screen will not retract evenly, ultimately causing the door to bind and fail to fully retract.
- A dent in either guide rail can cause drag or completely prevent the door from operating.
Occasional lubrication of the top and bottom guide rail with spray silicon will ensure smooth operation for years to come.
ADJUSTING SCREEN TENSION (Should NOT be required!)
Do not attempt to adjust tension unless there is very clearly a need to modify the factory setting. If there is any doubt whether adjusting is necessary, please contact your dealer or Dreamscreen for technical advice. See “troubleshooting” above before adjusting tension.
The tension adjusting wrench has been included for the RARE circumstance when the tension of the door needs to be increased or decreased. Improper technique while adjusting the tension will result in the complete unwinding of the spring and/or damage to the end cap.
Generally, it’s best to adjust tension with the housing not mounted so that enough torque can be applied. To increase tension, insert the supplied tension adjusting wrench in the hexagonal bolt, push the bolt in about 1/8th of inch, and rotate clockwise. Failure to push could cause the hex to strip and permanently damage the door. Be careful not to let the wrench slip, or the spring will unwind. It is recommended that vice grip pliers be used with the wrench. One turn makes a significant difference in tension. To decrease tension, follow the same procedure, except turn counter-clockwise. The Dreamscreen is wound with 15 turns from the factory.